You can print your invoices, sales orders and estimates with CCRQInvoice . We provide a form editor that lets you design your own form. Here is a quick article on how to add your company logo to a custom invoice form.
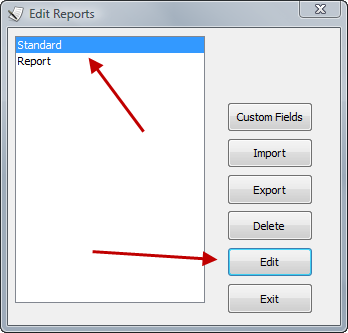
- Select Forms from the main menu in CCRQInvoice, then Edit Order Forms.
- Highlight the form you want to work with – if you haven’t created your own form yet, the only option will be “Standard”. Click the Edit button to open the form editor.
- In the upper left corner of the standard form there is a “CompanyName” and “CompanyAddress” block. These are the company information from your QuickBooks company file. If your logo contains your address information, you may want to delete these. Otherwise, you will need to click on them and move/resized them to make room for your logo. In this example, I’ll remove the “CompanyName” (click on it, press the “delete” key) and rearrange the “CompanyAddress”.

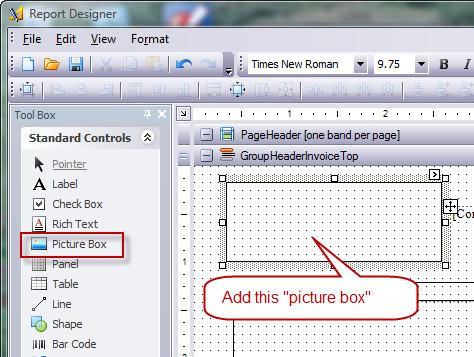
- Add a picture box control by clicking on the control in the tool box and dragging it to the form. Resize it to be the size you would like.
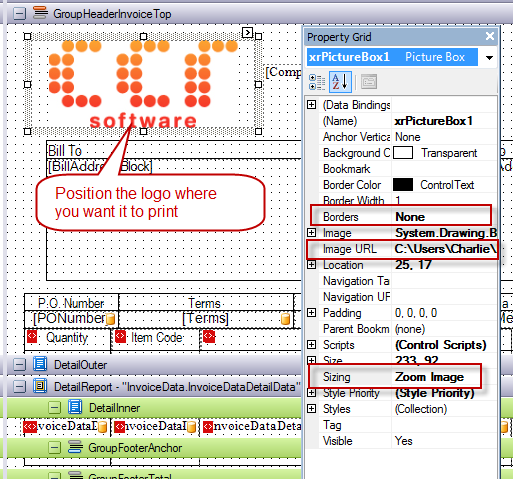
- Right click on the picture box and select Properties. A property grid box should open on the screen, usually on the right side. Change the following properties:
- Borders to “none”.
- Click on the Image URL option to get an ellipsis (…), click on that to open a file dialog. Locate a graphic file that contains your logo. This must be one of the typical Windows graphic files, such as a JPG, GIF, BMP or so forth. When you locate a logo, it will display in the control, but it might not look right.
- Change the Sizing property to “Zoom Image” (there is a dropdown list of options)
- Resize the picture box to size the logo appropriately.
- Save the modified form – either with File/Save As (if you started with the “standard” form) or File/Save. Close the editor window
In the print preview we see that the logo has been added.
![]()
Your logo should appear on the form.