The standard BOM (Bill of Material) report in CCRQBOM does not include any cost values, by design. Many businesses don’t want to show “cost” to employees on the shop floor. However, for management purposes, it can be beneficial to add “cost” to this report. This article will show you how.
Printing a Multiple-Level BOM
First, let’s show how to print a multiple-level BOM with CCRQBOM.
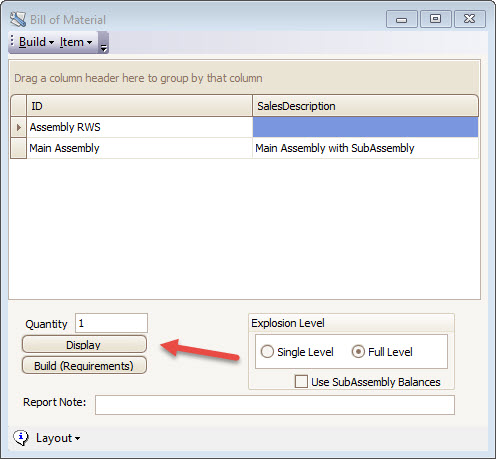
Select BOM from the CCRQBOM menu. This will open a window that lists all of the assembly items in your QuickBooks company file.
Set the Explosion Level to the desired level. Full Level will print all the details of any subassemblies.
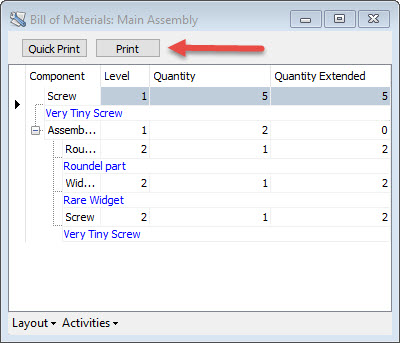
Select the assembly that you want to work with from the list, then click Display to see the BOM. In this example, there is a subassembly, and we have chosen Full Level.
The Quick Print button will print the BOM as you see it on screen. Note that you can add columns to this display by right clicking on the column headers, selecting the column chooser from the menu to get a list of columns, and dragging those columns to drop on the header display. Details on modifying a “grid” like this can be found in the printed documentation.
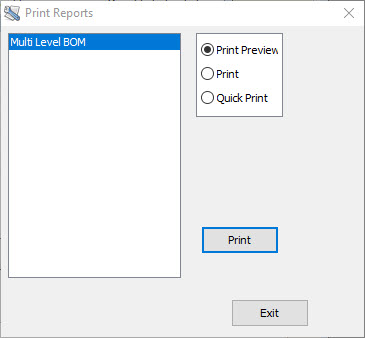
Most people will use the Print button. This opens a Print Reports window that lists any report templates that you have available. Select the template that you want to use (there is only one in this example), then select Print Preview, and then click the Print button.
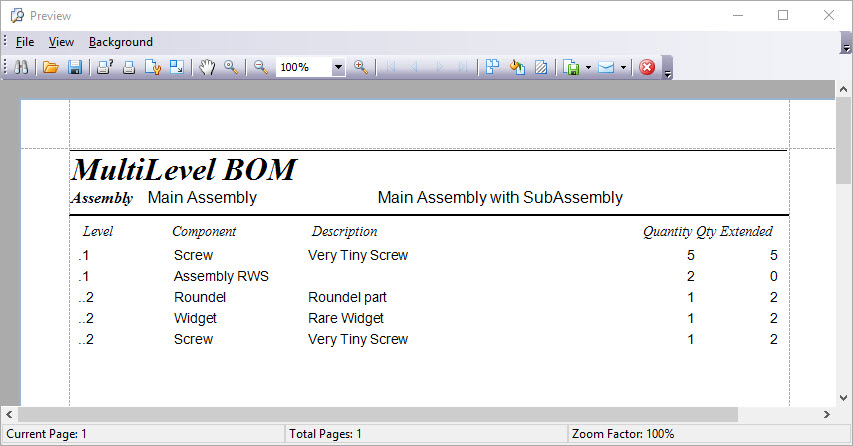
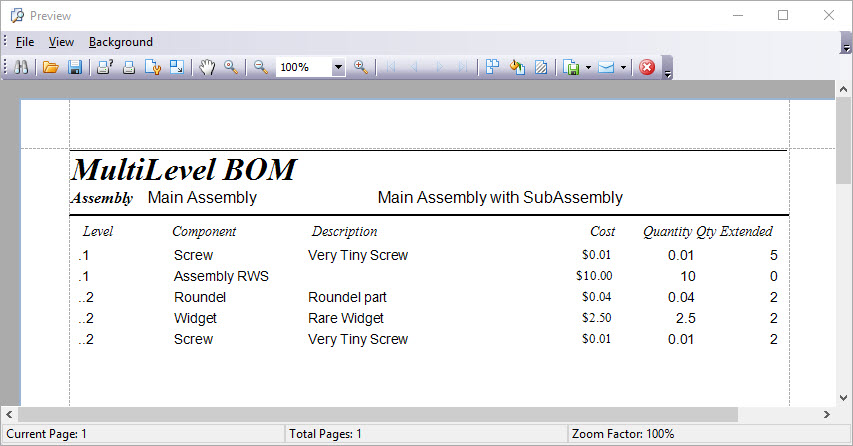
Here’s the standard multi-level BOM report from CCRQBOM, which includes the details of the subassembly.
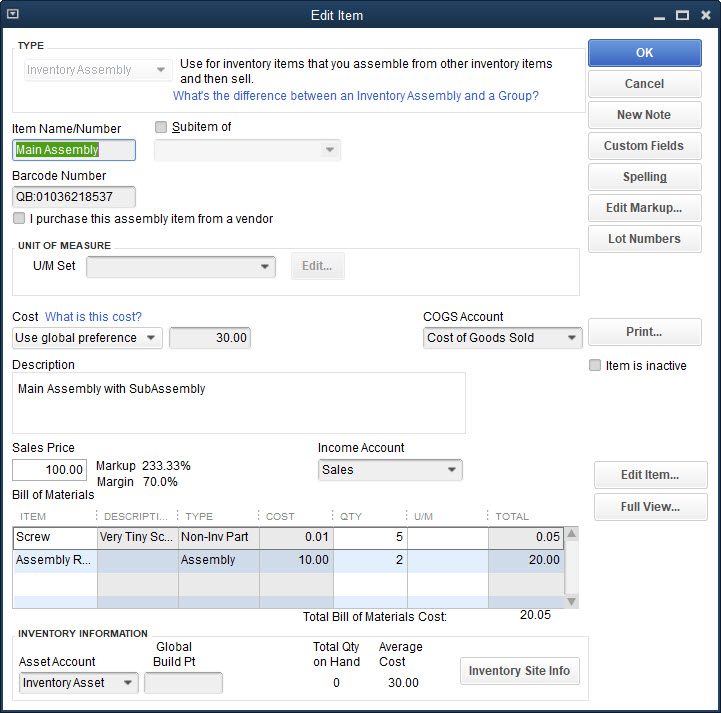
Note that “Assembly RWS” is a subassembly, and that there are two of them used in the higher level assembly “Main Assembly”.
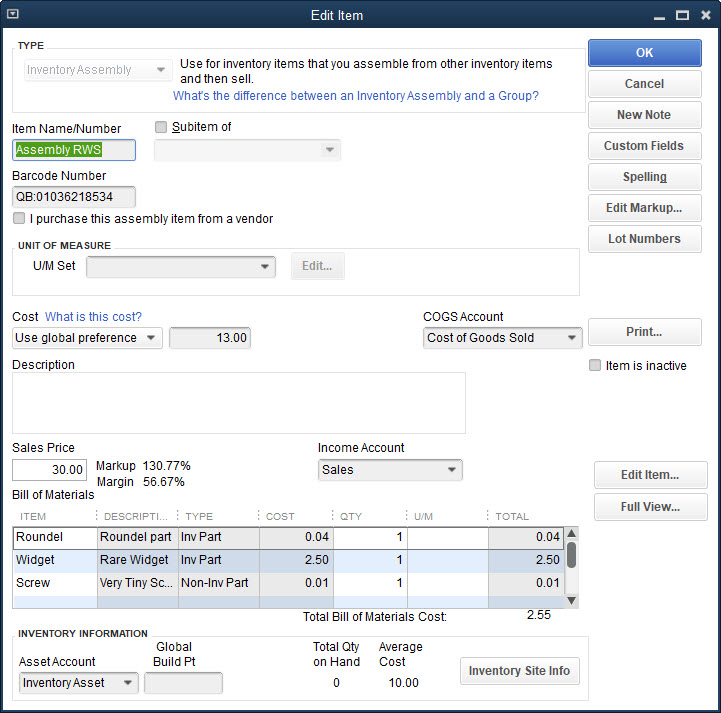
For reference, here are the two assemblies as you see them in QuickBooks.
Cost vs. Average Cost vs. Total Bill of Materials Cost
The problem with adding “cost” to a BOM is, which “cost” are you referring to? There are three “cost” values associated with an assembly item in QuickBooks, Cost, Average Cost and Total Bill of Materials Cost. For a detailed explanation of these, see the article Understanding QuickBooks Total Bill of Material Cost.
If you look at the “Assembly RWS” item in QuickBooks, as shown above, you can see that there are three different “cost” values shown:
- Cost: This is an editable field, you can enter any value you wish here. Usually this is the last purchased cost, but that is not guaranteed. In this case it is $13.00
- Average Cost: This is the value maintained by QuickBooks, based on the cost of components at the time the quantity on hand was built. In this case it is $10.00
- Total Bill of Materials Cost: This is based on the Cost values from the subassemblies. As the article explains, this isn’t always accurate. You can use the Cost function in CCRQBOM to update this value. In this case, the value is $2.55
As you can see, there are three values that can all be different.
The Total Bill of Materials Cost is not a value that is actually stored in QuickBooks.
Most people will want to see the Average Cost for components in a printed BOM. However, there are times when you might want to see the Cost value. Each of these are available in CCRQBOM.
Adding Cost to a BOM Report in CCRQBOM
Details on how to work with the report editor in CCRQBOM can be found in the printed documentation. This article will describe the steps in a summary fashion.
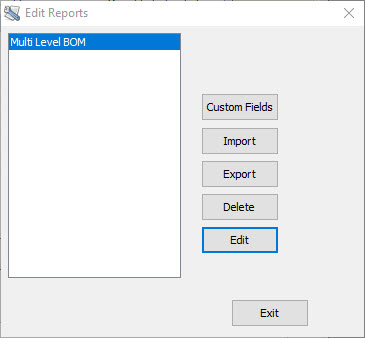
To create a modified BOM report, select Forms in the CCRQBOM menu, then Bill of Material. This opens the Edit Reports window.
Select the report template you would like to modify (there will only be one the first time you edit a report in CCRQBOM), then click the Edit button. This will open the report editor. Note that the first time that you do this after starting CCRQBOM, there may be a delay while the editor gets ready.
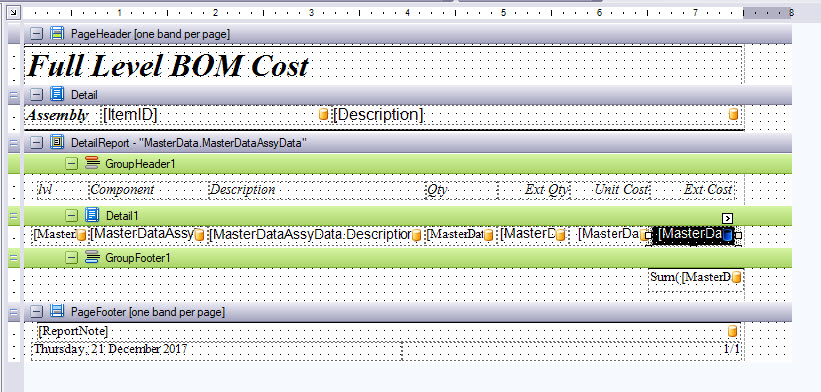
The details of the components are entered in the Detail1 band. Headers for those detail columns are entered in the GroupHeader1 band. Adding a column in the detail section does not automatically add a column header.
We will add the column first. I’ll add it to the right of the Description column.
Click on the data field for the Description column in the Detail1 section, to select it. Right click on the selected field, and in the popup menu select Insert and then Column to Right.
This adds a blank column to the right.
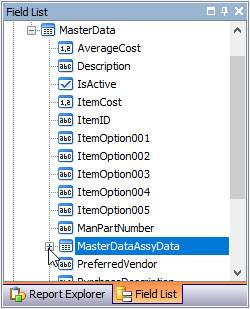
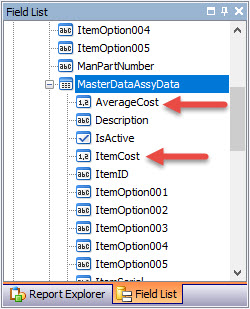
Now, on the right side of the edit window, click on the Field List tab. This will list all of the available fields. Select the MasterDataAssyData item, which is where the fields for the detail lines will be found. This is found within the MasterData section. It is very important that you use fields in this section for detail lines. Click the + symbol to expand the list of fields.
Within MasterDataAssyData you will find two fields. Use the one that represents the cost that you want to use. AverageCost is the average cost of the item. ItemCost is the “cost” field of the item.
Click on the name of the field you want to use, and drag the name over to the report, dropping it on that blank column you added.
Next, insert a blank column in the GroupHeader1 band, to the right of the Description column heading. Double click on the field to select the default text that shows there, and type in the name you want to use for this column, such as “Cost”.
Select File from the main menu, then Save As, and give the report a unique name. Click OK to save the name. Then select File and Exit to close the editor. You will see your new report in the Edit Reports menu.
When you print a BOM you can choose your new report template.
A couple of notes:
- If you have non-inventory items as components, they will always have an average cost of zero.
- If you have non-inventory items as components, they will have a cost of zero unless you check the box “This item is used in assemblies or is purchased for a specific customer:job” in the Edit Item window in QuickBooks, and enter a “cost” there.
Formatting the Cost Field
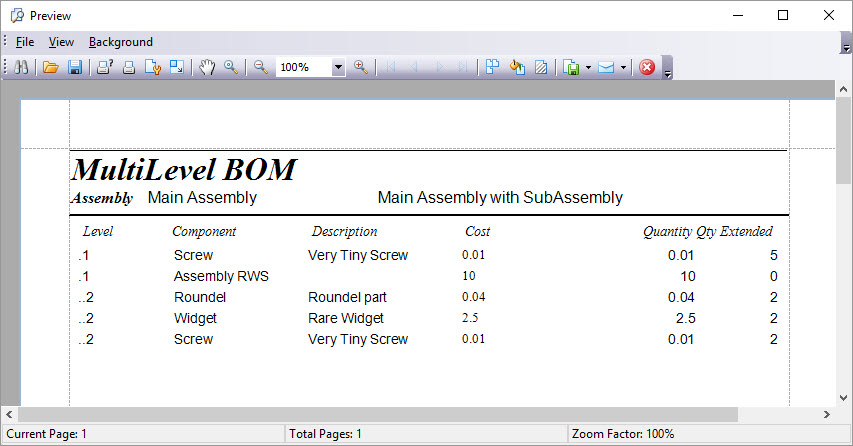
In my example I did not “format” the cost field, so the numbers don’t have the same number of digits after the decimal, and so forth. This doesn’t look good.
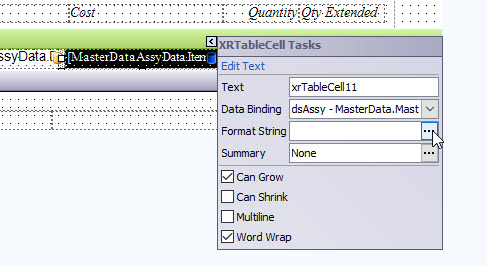
Editing the report, select the new “cost” column, and then click the “>” symbol that shows at the upper right. This opens a “properties” window.
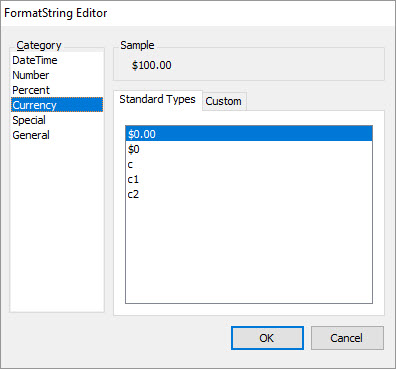
In the Format String property, click the ellipsis (…) to open the editor. There are a number of options you can choose here (more details in the printed documentation). I’ll pick “Currency” in this case.
Click OK to close the format editor.
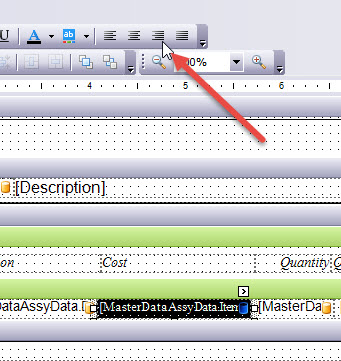
Now, select the Cost column again, and select the Right Justify icon in the toolbar. You might also want to do that to the column header.
Save the report, and print it again.
Extended Cost
Calculating the extended, and total, cost of an assembly is trickier. In this case I’ll use “Cost”, not “Average Cost”, since I have non-inventory items in the BOM that don’t have an average cost value.
I won’t give you the step-by-step process, just some summaries.
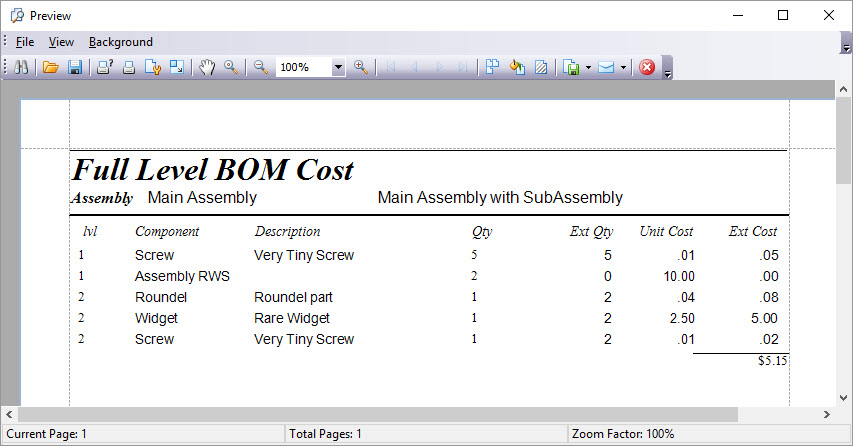
In this report I have columns for the level, component item, description, quantity, extended quantity, unit cost and extended cost.
For Extended Cost I will create a “calculated field”. For details on how to add a “calculated field”, see this article, scroll to the section on “creating a calculated field”. Here is the expression that I’ve created:
I’ve named this field “ExItemCost”.
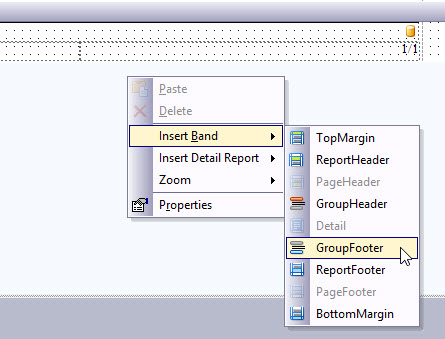
Next, we need to add another band to the report. Right click on a blank area in the report, not on any of the bands. In the popup menu select Insert Band, and then GroupFooter. The name usually defaults to GroupFooter1.
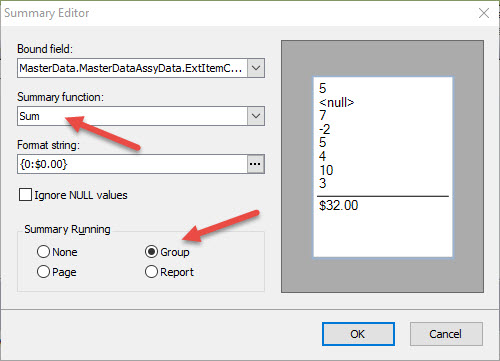
Next, I will add the “ExItemCost” field, found in the MasterDataAssyData section of fields, to the GroupFooter1 band. Position it under the Ext Cost column, set the format to currency, and set it to align right. In the properties, select Summary and set it to be a “Group” summary.
Save this, then run the report.
Note that this is a full-level BOM. The “Extended Quantity” for a subassembly item itself, and therefore the “Extended Cost”, is going to be zero. That is because the cost is calculated from the component items.
If you would like a copy of this report:
- Download the “repx” file from this link (this is a zip file): Costed Full Level
- Unzip the file to extract the file BOMCosted Full Level.repx
- Run CCRQBOM
- Select Forms and then Bill of Material
- Click the Import button, and select the repx file from where you saved it.
This will add “Costed Full Level” to your Bill of Materials report menu.
